Creating blocks
Blocks are the foundation of Snowfire. Creating blocks allows your editors to build websites in the same way as building with Lego
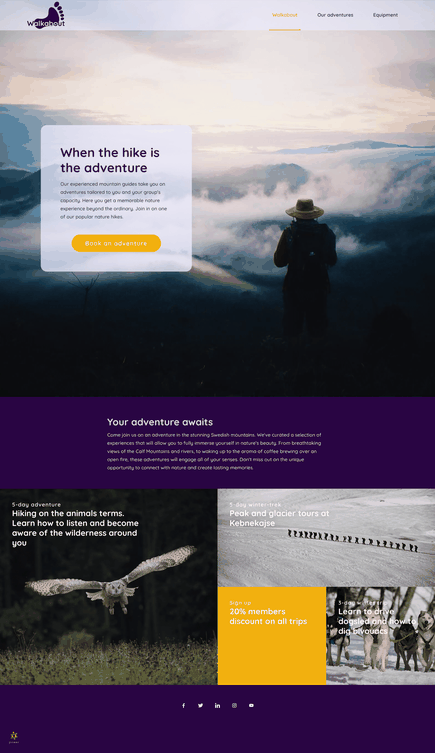
Lets look at an example page.

Blocks are stacked on top of each other. Looking at the example page we can see three blocks:
- Hero with background image and a call to action button
- Text
- Image grid
A block consist of one or more content tags. A content tag is something the user is able to change when editing the page. It might be a text, image or something else.
Block abilities
- Might have one or more content tag
- Controls the spacing between blocks above/below itself
- Has its own CSS styling
- Design changes made by editors inside Snowfire are applied to the block
A block has four different parts, and you access each part by opening the block and switching in the lower right corner. When you open a block it is always in HTML mode.
/https%3A%2F%2Fassets.v3.snowfirehub.com%2Fimages%2F120830%2F4_o_screenshot-2020-12-04-at-110339.png)
Lets look at the blank block to see how they are connected to each other.
HTML
<div class="hero-wrapper">
    Example
</div>
CSS
.hero-wrapper {
    background-color: $background;
    @include padding();
}
Properties
<properties>
     <color variable="$background" default="rgba(0, 0, 0, 1)" kind="background"/>
     <padding top="60px" bottom="60px"/>
</properties>
Each block is wrapped in div with the block name. In my case hero. In the CSS part we utilize SCSS variables and mixins. If you don't know what these are, don't worry.
Lets go trough it line by line:
background-color: $background
$background is a variable which is defined in the block properties on this line:
<color variable="$background" default="$sf-background-color" kind="background"/>
The first attribute is the name ($background) which we can use in our CSS file. The second attribute is the default value. This is the color the block will have when it's added to a page. In this example it will become black since we use an rgba string. The third value is only for the UI. It will tell users what kind of color this is.
Note: Colors should always rgba() in properties.
Adding content tags
To allow users to add their own content (text, images etc) we can use content tags. Lets look at an example.
<!-- Content tag -->
<sf-singlerow id=":1" html-element="h1"></sf-singlerow>

<!-- Output -->
<h1>Hello</h1>
This will allow "click to edit" when a user hovers the element in mode.
- All content tags starts with <sf-
- Attributes are forwarded to the HTML element, which gives you freedom to add things like class="my-title" to the content tag
- Content tags requires id=":1" where 1 must be a block unique number between 0-40.